Plastochem Adhesives is a leading manufacturer of solvent cements, primers, and cleaners for PVC, UPVC, CPVC, ABS and other plastic piping systems. Plastochem products are globally recognized for their premium quality for joint plastic pipes and fittings.
Here we are guiding step by step in total 6 steps, how to use Plastochem Solvent Cement for PVC piping systems, and precautions. Before beginning the installation, ensure you have all the necessary tools, products, and applicators required for the job.
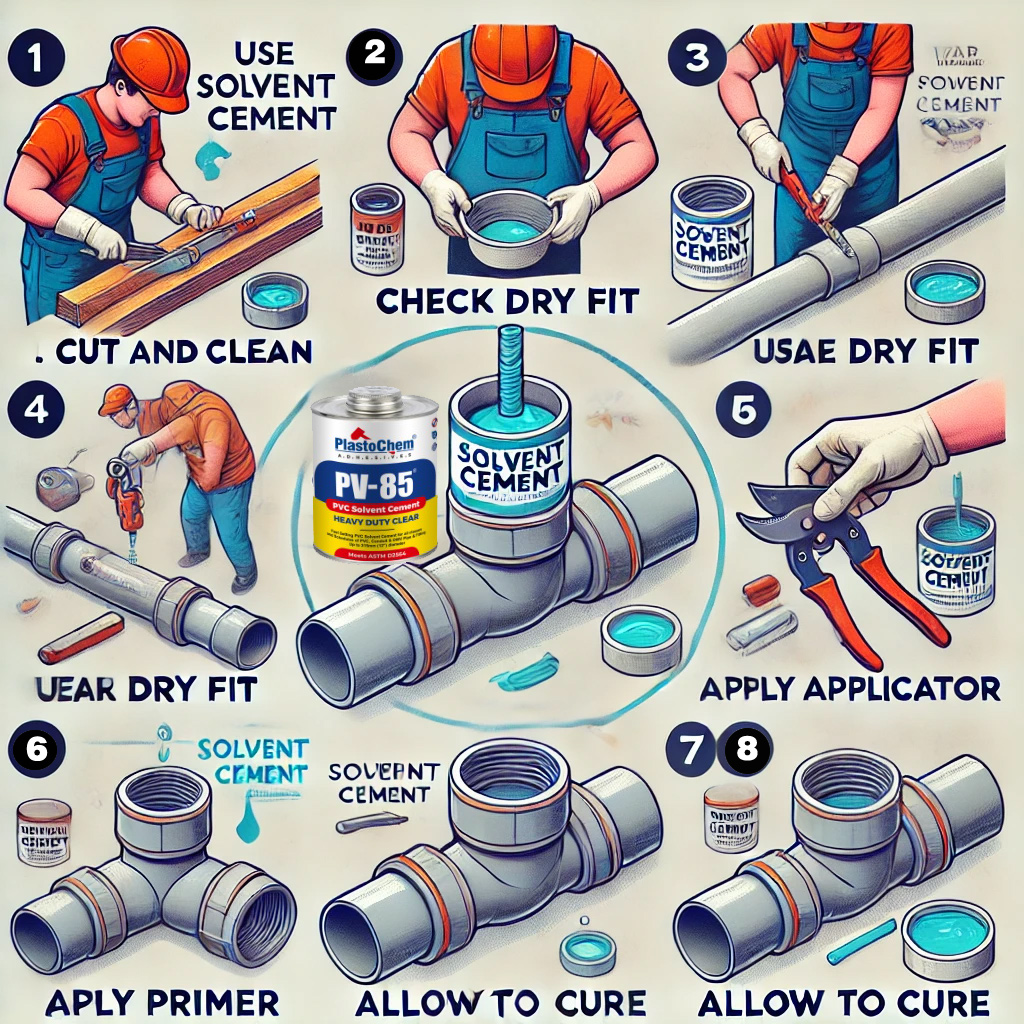
Step-by-Step Guide to Joining PVC Pipes Using Solvent Cement
Step 1. Prepare the Pipe and Fitting
- Cut the pipe squarely to the required length, ensure square cut ends and remove saw marks with sand paper.
- Make sure both side pipe surfaces are clean and dry, free from dust and contaminants.
Step 2. Check the Dry Fit
- Insert the pipe into the fitting to test the fit.
- The fitting should slide easily over the pipe end but become tight about halfway through.
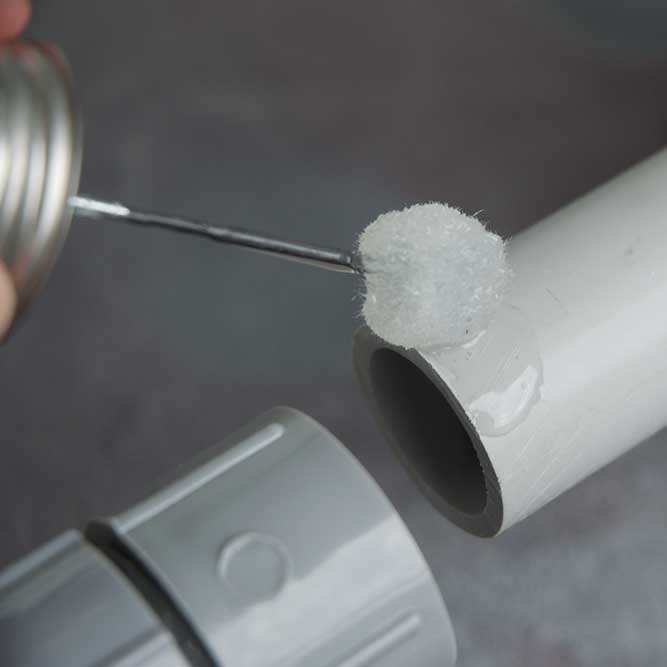
Step 3. Apply Primer (If Required)
- Apply Plastochem Primer to the pipe and fitting (if required).
- Rotate the primer applicator at least 10 times around the pipe.
Step 4. Apply Solvent Cement
- Quickly apply a full, even layer of solvent cement to the pipe, covering the depth of the socket.
- Apply two or three coats to the fitting’s socket, do not put excess solvent cement.
- Prevent cement from running inside the pipe or fitting.
- Before inserting the pipe into fitting, wipe off excess adhesive & allow it to dry.
Step 5. Assemble and Hold in Place
- Immediately join the pipe and fitting while the cement is still wet.
- After inserting the pipe into fitting twist it at 180°
- Hold the joint firmly for about 30 seconds to prevent pushout.
- Wipe away any excess cement.
Step 6. Curing Time
- Allow at least 5 minutes for handling strength.
- Allow 30 minutes of curing time for up to 160 psi pressure, for pipe sizes up to 2” at 60°F (16°C) or higher.
- For larger pipes, higher pressure, or lower temperatures, extend the curing time accordingly.
Caution
In case of eye or skin contact, flush with water for 15 minutes. If swallowed, give 2 glasses of water.
Keep out of reach of children.
Do not take internally.
Keep away from heat, spark, open flame, other source of ignition.
Vapours may ignite explosively.
Use only in well ventilated area; if not well ventilated, use forced ventilation.
Avoid breathing vapours and avoid contact with skin and eyes.
Use skin and eye protection.
If inhaled, move into fresh air; if vomiting, call physician.